Configure A macOS with M1 chip From Scratch
12 Jul 2022Finally I have saved some money to replace my loyal but old MBP with a new one with M1 pro chip. Here is how I configure it to my comfortable working environment.
My system version is macOS 12.4, with M1 pro chip.
- 1. Command Line Tools and Homebrew
- 2. Set up Git token for password-free interaction
- 3. Install Mambaforge
- 4. Install Oh-my-zsh, theme and useful plugins
1. Command Line Tools and Homebrew
On a brand new system, first install the basic command line tool and Homebrew package manager.
Run following codes in the Terminal, it should prompt an installation GUI to get you through, just follow their instructions.
xcode-select --install
It is possible that you have installed command line tools before. If that is the case, you will see some words like “xcode-select: error: command line tools are already installed”. It is totally Ok, just move to the Homebrew installation.
Then install Homebrew with:
/bin/bash -c "$(curl -fsSL https://raw.githubusercontent.com/Homebrew/install/HEAD/install.sh)"
According to this tutorial:
On Apple Silicon machines, there’s one more step. Homebrew files are installed into the
/opt/homebrewfolder. But the folder is not part of the default$PATH. Follow Homebrew’s advice and create a~/.zprofilefile which contains a command which sets up Homebrew.
So we have to do
echo 'eval "$(/opt/homebrew/bin/brew shellenv)"' >> ~/.zprofile
eval "$(/opt/homebrew/bin/brew shellenv)"
After the installation, run brew in the Terminal, if you see some brew tutorial words as “Example usage…”, you are ok with the step.
2. Set up Git token for password-free interaction
Then set up Git config and Github token on the computer, you can interact (push and pull) with Github repos in a password-free manner. You should have a github account before this step, you can register for free if you haven’t.
First install the newest git with homebrew to replace the default one:
brew install git
Then quit and reopen the terminal, check the git, you should see
>>> which git
/opt/homebrew/bin/git
Then Config your github username and email in global parameters, s.t. Github serve will know who you are:
# Remove the quotation marks and replace the words inside with your account info
git config --global user.name "user-name"
git config --global user.email "user-email"
Check all configs:
git config --list
For a convenient password-free interaction manner, first setup a personal token accroding on the github website.
Then clone any repo to your local space with the token in the password place. Once this is completed, the new token will be cached in your Keychain Access and you can do password-free access in the future, see this for details
3. Install Mambaforge
Now we have the a new python environment manager, Mambaforge, which supports nearly all common comamnds in conda but much lighter than even miniconda,
Do the following:
wget https://github.com/conda-forge/miniforge/releases/latest/download/Mambaforge-MacOSX-arm64.sh
bash Mambaforge-MacOSX-arm64.sh
And follow the instructions during installation, you will be all set.
4. Install Oh-my-zsh, theme and useful plugins
This is my favorite part. I use zsh instead of bash as my local shell because zsh has pretty themes as well as powerful plugins, and Oh-my-zsh provides an elegant way to manager them.
Here is how to install them.
First, change your shell to zsh. macOS has zsh as its default shell, but you can check and change shell with the following codes:
- List all available shells
cat /etc/shells - Check current shell
echo $SHELL - Change shell to zsh
chsh -s /bin/zsh
Then, according to their documentation, install oh-my-zsh with:
sh -c "$(curl -fsSL https://raw.github.com/ohmyzsh/ohmyzsh/master/tools/install.sh)"
There will be a .zshrc text file in your home directory.
You can easily change words inside and source ~/.zshrc to make a new configuration happen.
I have uploaded my configuration files, theme (I modify the af-magic theme) and Terminal color scheme in this repo.
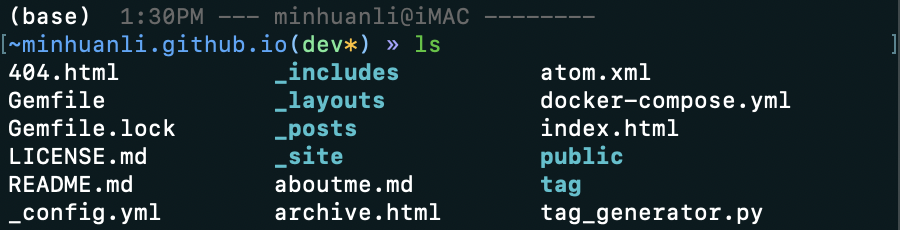
Here is how my prompt looks like:
You can explore your favorite themes here.
Another (or main) highlight of oh-my-zsh is its convenient management of abundant powerful plugins, which will make the working process much more productive and enjoyable.
I list my favourite plugins here, there are more than 200 plugins you can explore here
4.1 Easy-set plugins: git, sublime, web-search, osx, vi-mode
Easy-set plugins are really “easy to set”, you simply add the plugin name in to the plugins line in ~/.zshrc and source the file, like:
plugins=(git sublime web-search macos vi-mode)
- git:
provide useful alias regarding git commands, likegst = git status - sublime
open file by sublime text withst "file-name", you should have sublime installed first. - web-search
Enable you to search through many engines in command line, likegoogle "something" - macos
An extremely useful tools with a few utilities in macOS. Like you can open the current directory in finder byofd, let the spotify play a music withspotify play.
4.2 Have-to-install plugins: zsh-autosuggestions, zsh-syntax-highlighting, autojump
These plugins are not included in a standard oh-my-zsh distribution, but you can still easily install them by one more line
- zsh-autosuggestions
A very useful tool to suggest commands as you type based on history and completions.
You can install by:
clone this repository into$ZSH_CUSTOM/plugins(by default~/.oh-my-zsh/custom/plugins)git clone https://github.com/zsh-users/zsh-autosuggestions ${ZSH_CUSTOM:-~/.oh-my-zsh/custom}/plugins/zsh-autosuggestionsadd the plugin name into
~/.zshrcand source the fileplugins=(... zsh-autosuggestions) - zsh-syntax-highlighting
This package provides syntax highlighting for the shell zsh. It enables highlighting of commands whilst they are typed at a zsh prompt into an interactive terminal. This helps in reviewing commands before running them, particularly in catching syntax errors.
You can install by:
clone this repository in oh-my-zsh’s plugins directory:git clone https://github.com/zsh-users/zsh-syntax-highlighting.git ${ZSH_CUSTOM:-~/.oh-my-zsh/custom}/plugins/zsh-syntax-highlightingadd the plugin name into
~/.zshrcand source the fileplugins=(... zsh-syntax-highlighting) - autojump
autojump is a faster way to navigate your filesystem. It works by maintaining a database of the directories you use the most from the command line. You can install by:
install autojump by Homebrewbrew install autojumpadd the plugin name into
~/.zshrcand source the fileplugins=(... autojump)
References